
Installation
Install the CloudPages plugin into the Fishbowl Advanced client once per workstation. Pages themselves need no further install — they load from a repository the next time a Page is opened.
Prerequisites
Section titled “Prerequisites”| Requirement | Notes |
|---|---|
| Fishbowl Advanced client | CloudPages runs inside the client’s built-in browser component. |
| CloudPages license and plugin | Supplied by ILC. Contact your account representative to obtain them. |
| A repository | An ILC-hosted repository, or your own Git repository (GitHub, GitLab, or any Git host). See Configuration. |
Install the plugin
Section titled “Install the plugin”- Place the CloudPages plugin JAR in the Fishbowl client’s
plugins/folder. - Restart the Fishbowl client.
- Select Reporting → CloudPages to confirm the plugin loaded.
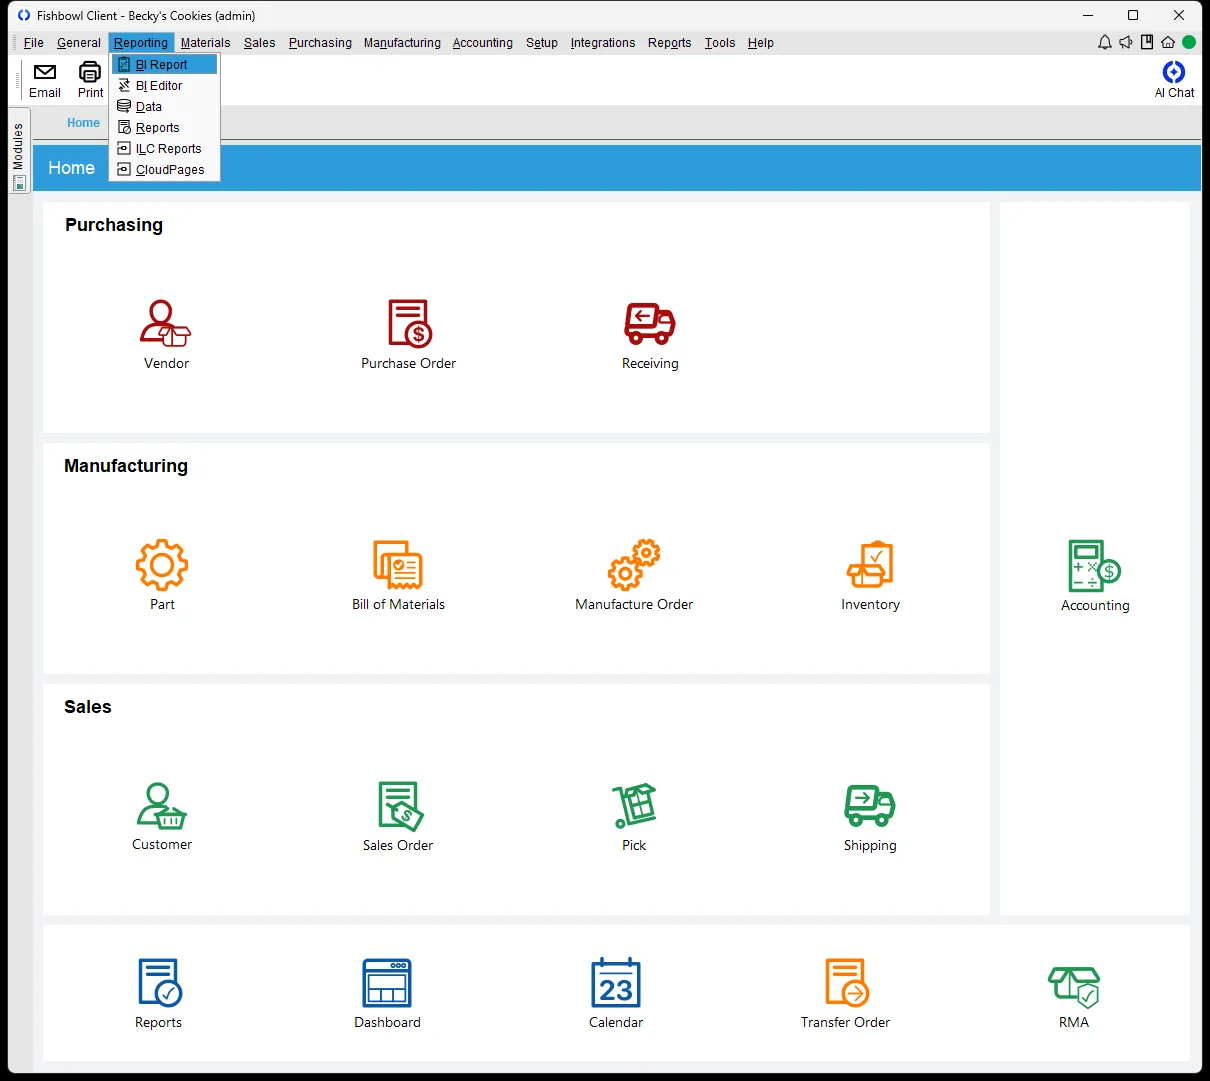
Keep the plugin updated
Section titled “Keep the plugin updated”CloudPages updates are self-hosted by ILC and applied through Fishbowl’s own update mechanism. Updates are free.
Manage updates from Tools → Module Options → Updates, which shows the installed version and a Check for updates button.
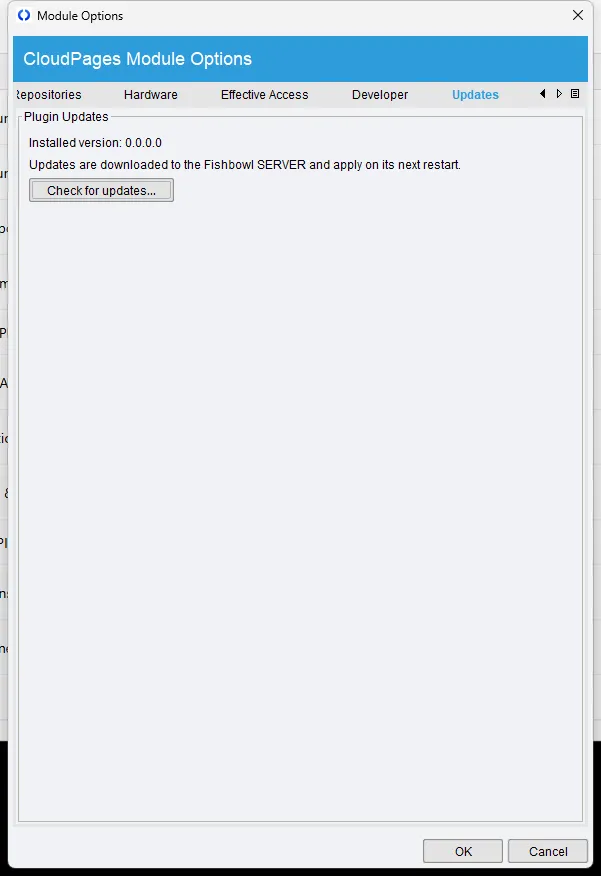
- In the CloudPages module, find the update button on the toolbar. It reads Update available (version) when an update is waiting, or Check for updates otherwise.
- Select it. Review the changelog in the confirmation dialog.
- Confirm. The Fishbowl server downloads the new plugin.
- Restart the Fishbowl server to finish the update.

Related
Section titled “Related”- Configuration — add a repository and connect it.
- Administration — access rights and licensing.