
Configuration
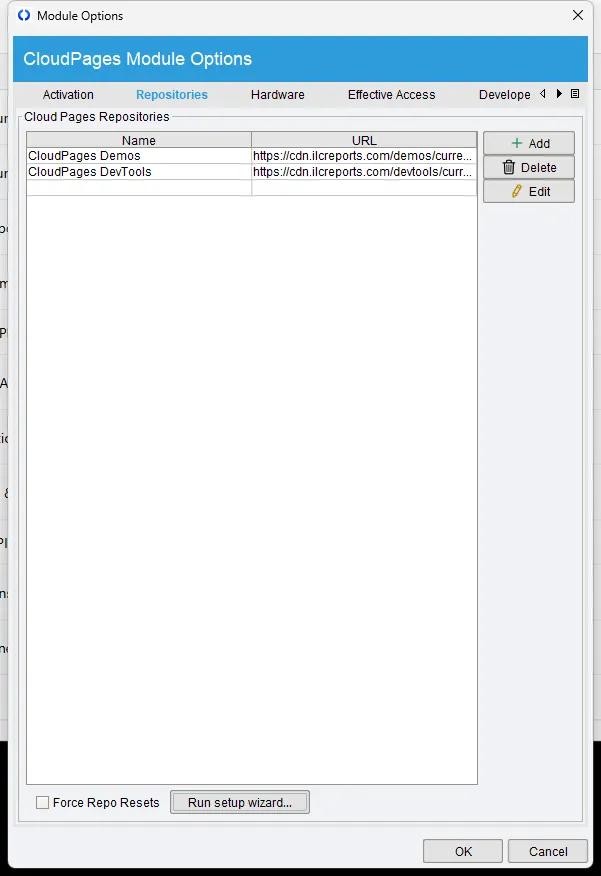
CloudPages loads Pages from one or more Git repositories. Configure repositories from the module options dialog in Fishbowl.
Open module options
Section titled “Open module options”In the CloudPages module, select Tools → Module Options, then open the Repositories tab. It lists the repositories CloudPages pulls Pages from.
Add a repository
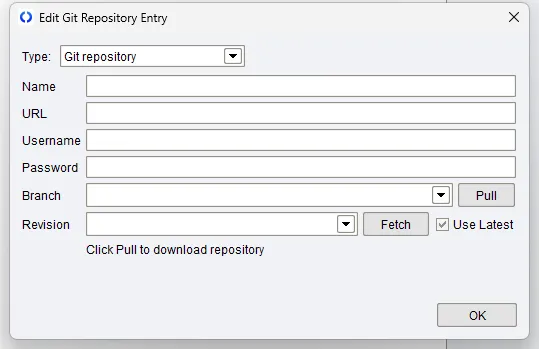
Section titled “Add a repository”- Select Add to open a new entry.
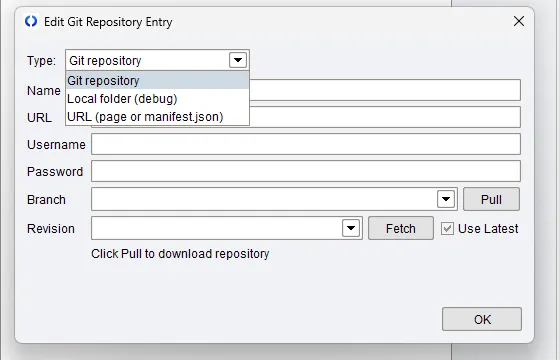
- Choose the Type: a Git repository, a local folder (for development), or a
URL that points at a page or
manifest.json. - Paste the repository URL into the URL field.
- Choose the branch.
- Select Pull, then OK.
One-paste URLs with credentials
Section titled “One-paste URLs with credentials”If you paste a full URL that includes credentials, CloudPages splits it for you when you leave the URL field:
https://USERNAME:PASSWORD@git.example.com/git/your-repo.gitbecomes:
- URL →
https://git.example.com/git/your-repo.git - Username →
USERNAME - Password →
PASSWORD
A plain URL with no credentials is left unchanged — fill Username and Password yourself if the repository needs them.
ILC repositories versus your own
Section titled “ILC repositories versus your own”- ILC-hosted repositories connect with no license and do not count against your free repository slot.
- Your own (non-ILC) repository — you may connect one without a license. Connecting a second non-ILC repository requires a license; its Pages will not pull until you license it.
For the full rule, see Administration.
Related
Section titled “Related”- Installation — install the plugin first.
- Administration — access rights, metadata overrides, licensing.